Welcome to my virtual workshop on handlettering and calligraphy, Lettering 101! I’m so glad you decided to join me and I only hope I can convey my knowledge in a way that you find both informative and enjoyable!
So many times when starting a new hobby, it’s easy to feel overwhelmed, intimidated by others’ creativity, and ready to throw in the towel after a few weeks or months. I know, I’ve been there. When I first began lettering, that’s how I felt. But for some reason, this craft found its way into my hands and heart.
Even now when I see how amazing some of the artists are on Instagram or how many followers another person has, I feel inadequate. But I know that the answer to this is not to quit what I’ve pursued for nearly two years. Instead, I’m shifting my focus to teaching others! So here I am, compiling a lot of information into a series that you can follow along with to start (or continue) your own journey!
SUPPLIES NEEDED
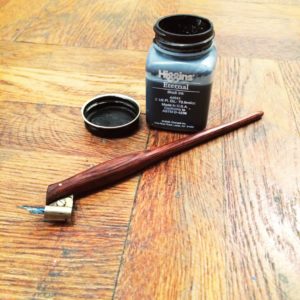
 It really only takes paper and a pencil to begin lettering (duh!), but for the sake of this practice, I’m using a Leonardt EF (extra fine) Principal Nib in a wooden hourglass oblique penholder with an adjustable flange. (WHAT DOES THIS MEAN?? I’ll break down various nibs on a separate blog post later in the series. I’ve tested about 25 of them for you!). This is my favorite nib, but it’s pretty flexible so I wouldn’t have worked with it as a beginner!
The following is my go-to list of supplies I suggest to beginners. Why spend a ton on things you don’t know if you’ll use? For the record, I still use these items so they have definitely been worth the small investment.
- Speedball Oblique Penholder
- Zebra G Nib (get several)
- Sumi Ink (I believe this is the kind I use – I purchased a large well from a calligrapher without a label)
- Rhodia Pad
- Recollections Cardstock (for printing my grids or others you wish to use)
 Feel free to use a brush pen, ballpoint pen, pencil, WHATEVER YOU HAVE! The basic ideas apply to each of these medias.
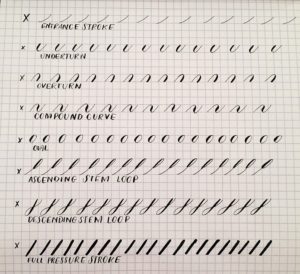
On my practice sheets for this lesson, I’ve provided a breakdown of 8 different strokes that are important strokes in building your lettering foundation. There are guidelines and examples as well as blank guideline sheets so you can print as many as you’d like and practice whatever you’d like! I used a Wacom Intuos Tablet to trace my strokes, so they aren’t as true to my own strokes. For that reason, I took a picture of a page I did of all the drills.
Before you begin these drills, I want you to get acquainted with your nib and the holder. I’ll do posts on these at a later date, but for now, see these blogs for great info on both.
- About Oblique Pen Holders
- How to Prepare a New Nib for Copperplate Calligraphy
- Writing with an Oblique Holder
Like I said before, you can choose to do these exercises with a simple pencil and paper. But if you have the supplies I mentioned above, these are great resources to get started with those tools.
Okay, now without further ado, you’re ready to start Week 1 // Drills!
P.S. I’d love to see samples of your work. I’ll be watching on Instagram for #lettering101. Upload your photos and tag so I can spread the love!
Hi Nicole,
It says wrong password when I input the password provided. Can you check and advise please? Thanks! 🙂
Thank you!! My husband was working on this into the wee hours and he protected as lowercase and published as uppercase. I have it fixed to UPPERCASE now so you’re all set!
Thanks for fixing it, Nicole! Am downloading the packet now, can’t wait to get started! 🙂
You’re welcome! Thanks so much for your patience and for following along. Make sure to tag your practice so I can see 🙂
How do I get a password to download the packet? I am a new subscriber. Thanks!
It should be in your welcome email at the bottom where the list of previous and upcoming newsletters is, but I’ll send you a quick email just in case. Thanks for signing up! (I’m Mr. Macaron + White, by the way)
Thank you Patrick!